Showing posts with label Cupcakes. Show all posts

Friday, August 27, 2021

Reese's Peanut Butter Cream Cheese Frosting Filled Brownie Cups [revisited]


Today just happens to be, "Just Because" day!

It's also my son-in-law's birthday.

As I was searching back through the sweet years of Sugartown Sweets, these caught my eye. They have been requested by family and friends more than once! Yes, because they are so yummy!

So after sharing them with you all over seven years ago, I'm reposting them. Just Because! 

Here is the link  to this delectable treat!

You're welcome! 😋


John 3:16

'til we sweet again, Karen 💗


Saturday, January 19, 2019

Purple Palooza Cupcakes aka, Disney, Here We Come Cupcakes!


The Countdown is On!
Zip-a-dee-doo-dah, we're going To Disney World!

I've got four grandbabies that are beyond excited to be heading down to the Sunshine State in a few days! 2018 was a tough year health-wise for our family, and we had to put this trip off way back in September, and so this vacation is made even that much sweeter.

Did you know that Disney has introduced the newest trend in the "Happy Place" and their fans are seeing purple..Potion Purple that is!?

Purple Mickey ears, purple bags, purple tops, purple apples, purple cupcakes, and lots more!

I've already made my WDW bucket list of must-eat treats. Now it looks like we may have to add a few! But you know, I think we can handle it!

In the meantime, these Potion Purple wannabes are going to have to tide us over. But not for long! Orlando, here we come! But first, I share with you, my Purple Palooza cupcakes. I began with a chocolate cake mix-that I doctored up a little-and then topped my cupcakes with a fun homemade sprinkle mix of purple everything!

To make my sprinkle mix, I made a trip to Michael's Craft Store and bought everything purple. I also used purple Sixlets and gold stars.
For the cupcakes, I used a Pillsbury chocolate mix.
I then subbed coffee for water, used 4 eggs instead of three, and added 2 teaspoons vanilla.
Mix and bake according to instructions on box.
The unbaked batter smelled so good...mmmm!
Mmmm..but even better after it was baked! I then colored my icing using Wilton purple gel. The taste was pretty strong because I used too much color. I think I will use the pre-made, color tubes next time. I used a 1M decorator tip to pipe my frosting after cupcakes were fully cooled.
I piped a super simple rosette onto my cupcakes.
It's a purple~icious party!
Oh! These purple beauties! ðŸ˜‹
Because I love ya, and because you just might be a Disney nut like me, I am gonna take plenty of photos of all the purple yummies and share them with you when we return!

Have a super Sweet Day and "See Ya Real Soon, Karen 😊

Wednesday, August 20, 2014

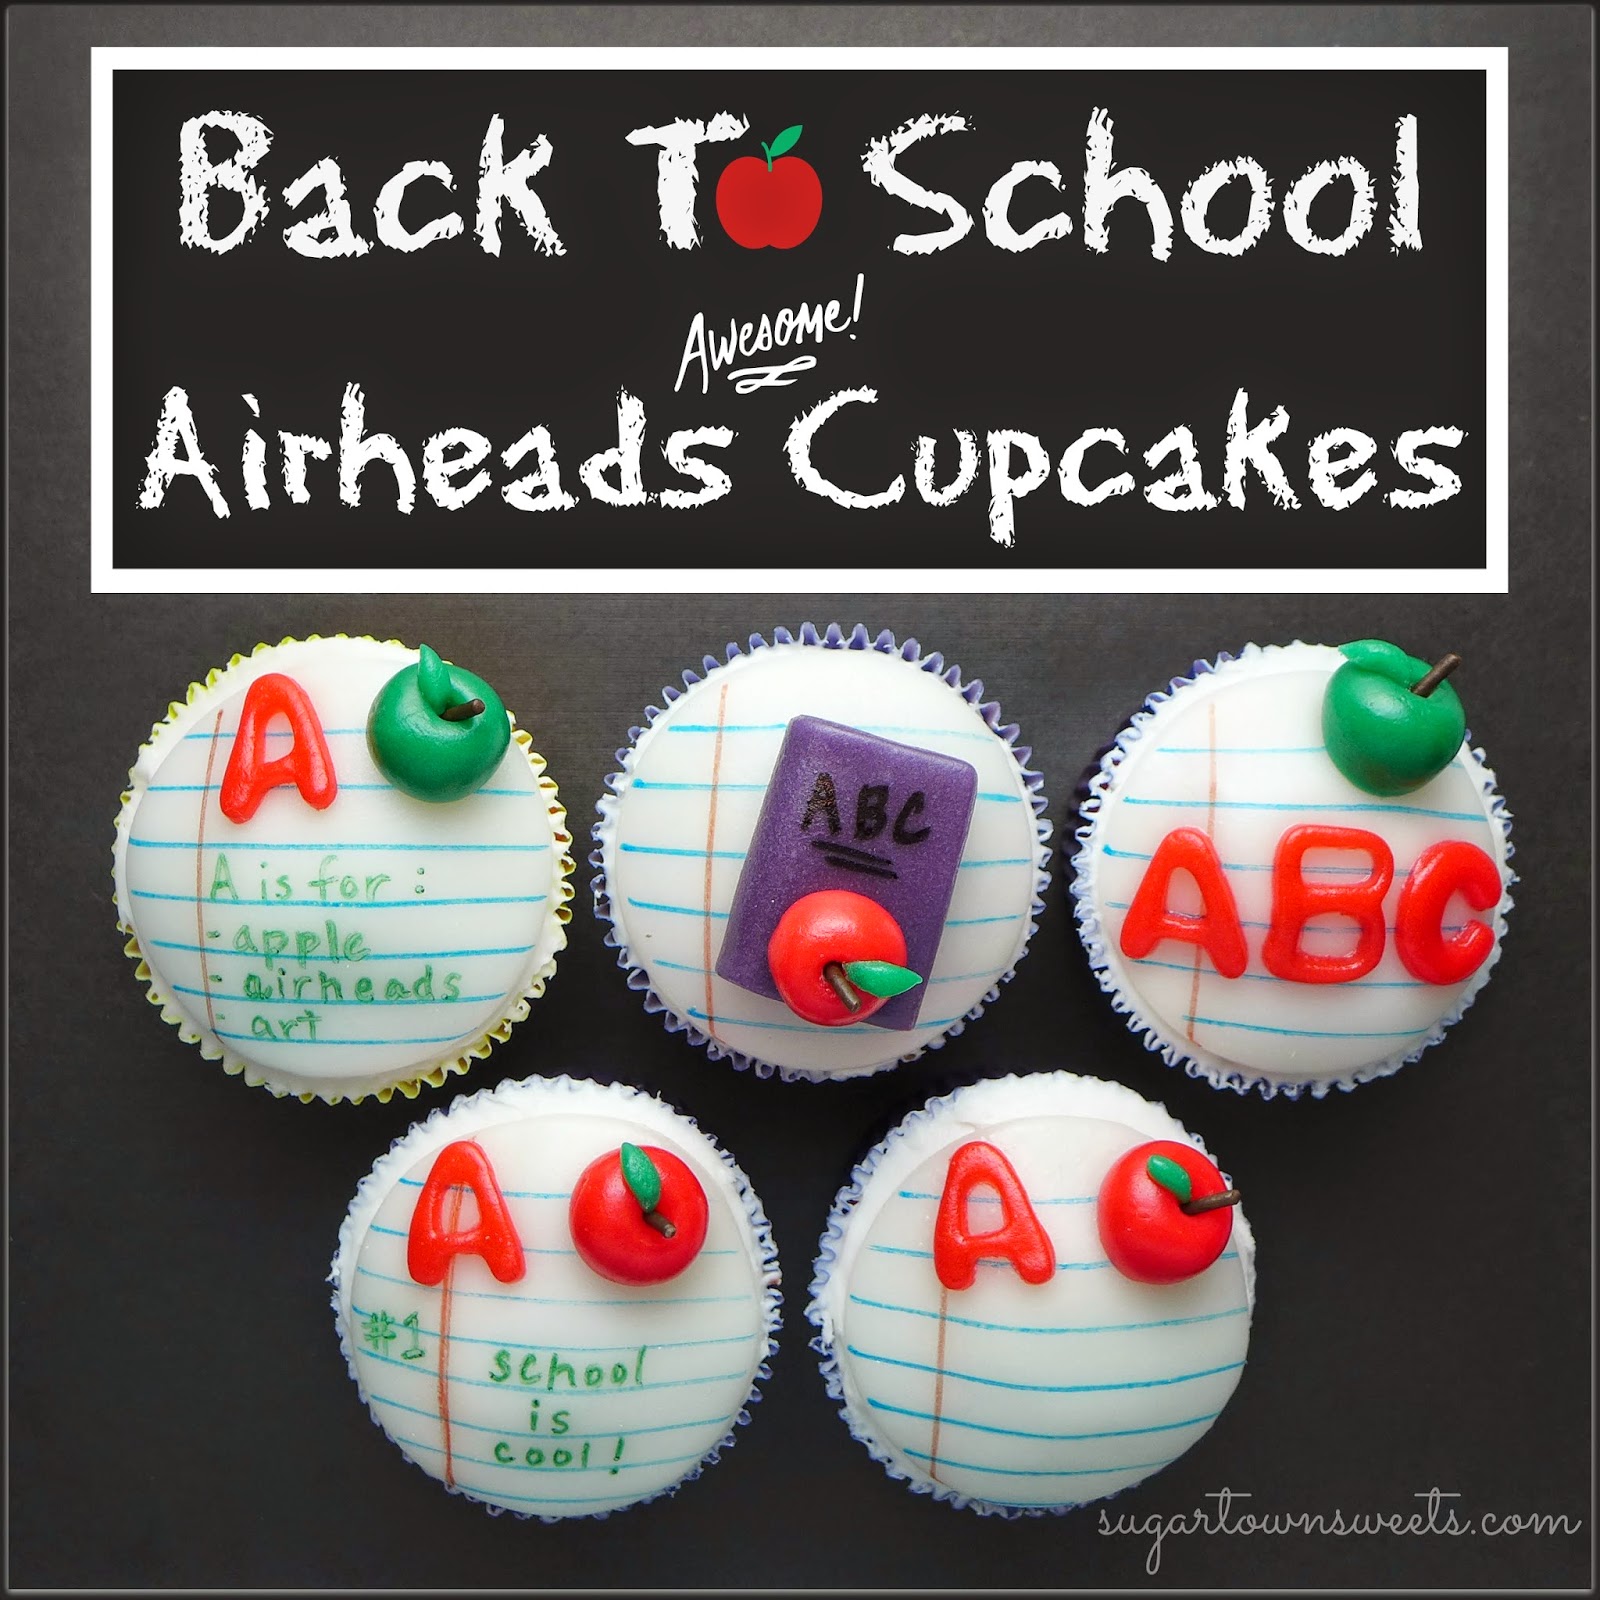
Airheads Back To School Cupcakes

I'm so excited to post these cute little cupcakes!

This is my first sponsored post (woo hoo and yippee goes right here)!
Any and all opinions (plus the huge candy stash) are my own.
Yay to finally getting to say these super fun words!

Okay..are you ready to craft with Airheads?

These colorful and tasty bars of candy have been around since 1986. 
But it wasn't until a couple of years ago that I actually tasted them for myself. Yum!
Cherry is my favorite with the white mystery a close second. 

Lucky for me I am using both of these flavors today!

So these little Airheads are going "Back To School"..how brilliant of them.

Airheads Rule!
For some fun, you can follow Airheads and Airheads Xtremes on Facebook. 
I created a couple of crafts using the Airheads Xtremes a while back. 
You can see those by clicking here and here. 
Wall-to-Wall Airheads!
Bake your favorite cupcakes and ice smooth. I wanted a fun flavor as my cupcake base, so I added one unsweetened Kool-aid packet to my boxed cake mix. Cherry of course!
Items needed to make the "notebook paper" toppers.
~fondant roller
~foodwriters
~circle cutter-I used a 2 inch size
~sharp scissors (I have a pair that I use solely for food items)
~parchment paper
~non-stick spray
~straight edged object-such as a ruler
It takes nearly one full size bar of candy to make one "notebook paper" round. Soften in microwave for five seconds. You might want to do a test run with your own microwave first. 
You do not want to melt the candy, just slightly soften it.

Roll the candy into a ball. I rolled my candy out on a sheet of parchment paper. No sticking! 

Lightly spray your cutter with non-stick spray. Wipe off excess and you can now easily cut your candy. I gathered the leftover candy scraps to see if they could be reused. Yes! Just soften again in the microwave. 

Use a ruler or straight edge to draw lines as pictured above with blue and red food color pens.
Items needed to make candy apples.
~cherry and watermelon airheads
*~fondant tools: dog bone and pick
~chocolate jimmy sprinkles
~scissors

Let's make an apple with cherry Airheads!
While we're at it, let's make some cute little green apples too!

Cut a small piece of candy. Again, soften in microwave for about five seconds. Roll into a small little ball. I used my fondant tools to make an indention and small hole in top of the apple. Press in candy sprinkles for the stem. 

I used my scissors to freehand cut a tiny little green leaf. Just press it into the apple beside the stem.

*If you do not have these fondant tools, try improvising with items found in your utensil drawer.
I used my Wilton Cut-Outs set for the letters. Until I put this post together, I didn't know this set was obsolete. In the updated version, there is just a slight 7/8 in. difference in size.  
Click here for the link to the new set. 

To make the letters, cut a small piece of candy and soften. No need to roll these into a ball. Just flatten with fondant roller. Lightly spray cutter and press firmly into candy. 

I used the rounded handle of a paintbrush to gently press letter out.
You may not need to do this with the newer set.
Place the "notebook paper" toppers on cupcakes.
Place all other candy pieces on topper.
The natural tack of the Airheads will keep the decorations in place.
Got Airheads?
Make sure you keep your decorated cupcakes in a cool place.
The heat will melt these little babies.
Wishing You a Blessed Day From
Sugartown Sweets!

Thanks for stopping by.  :o)

Comments are welcome as are new members to my blog!

~Post Sponsored By Airheads~

Wednesday, July 17, 2013

Scharffen Berger Chocolate Cupcakes


Yay! You've just found your new favorite Chocolate Cupcake Recipe!
Beginning and ending with Sharffen Berger Dark Chocolate, I'm pretty sure you'll find..
you just can't stop at one! Hubby and Grandkids rated these a 10!
If you need an instant *happiness* boost, just open up a jar of coconut oil or a bar of Scharffen Berger chocolate and take a nice long sniff...ahhhhh.. 


Frosted & Delicious~Dark Chocolate Cupcakes!
Cupcakes and Frosting are recipes I adapted from Chocolate Fantasies cookbook.
~~~~~~~~~~~~~~~~~~~~~~~~~~~~~~~~~~~~~~~~~~~~~~~~~~~~~~
Scharffen Berger Dark Chocolate Cupcakes
1/2 cup coconut oil
2 cups sugar
2 eggs
4 (1 oz.) squares unsweetened Scharffen Berger dark chocolate
1 3/4 cups all-purpose flour
1/2 teaspoon baking powder
1 teaspoon baking soda
1 teaspoon salt
3/4 cup buttermilk
3/4 cup water
1 teaspoon vanilla extract
In mixer, cream coconut oil . Add sugar, beating well at medium speed. Add eggs one at a time, mixing well. Add melted chocolate, mixing well. Combine flour, baking powder, soda and salt in separate bowl. Add to chocolate batter alternately with buttermilk, beating well after each addition. Add water and vanilla, mixing well. Prepare two 12 cup muffin tins with cupcake liners. Fill each tin 3/4 full with batter.
Bake 18 minutes @ 350 degrees.

Scharffen Berger Dark Chocolate Frosting
1/4 cup coconut oil
2 (1 oz.) squares unsweetened Scharffen Berger dark chocolate
2 cups 10 x sugar
1/3 cup evaporated milk
pinch of salt
1/2 teaspoon vanilla
Melt coconut oil and chocolate over low heat. Add sugar, milk and salt. Beat on medium speed with mixer until smooth. Stir in vanilla. (I let mine cool completely to thicken up a bit as I wanted to pipe the frosting onto cupcakes) 
For added visual interest..I made chocolate ribbons from a chocolate bar with a vegetable peeler. I also drizzled the cupcakes with some of the frosting. Ooh la la!
Thank you visiting
SUGARTOWN SWEETS!
Have a Sweet Day!
Comments are welcome.


Wednesday, November 21, 2012

Turkey In The Straw Cupcakes!

TURKEY IN THE STRAW CUPCAKES!
Happy Thanksgiving Everybody!
If you need a last minute & super easy Thanksgiving cupcake..here it is! 
I have so many blessings to be thankful for. I have a wonderful family to celebrate the holiday with. I am blessed with a wonderful church, pastor and church family.
Thank you LORD for your blessings on me!
 And now..I get to eat these cute & yummy cupcakes! :o)
Ingredients needed for Turkey in the Straw Cupcakes listed above. *edit* Tracking a link back to my blog, I found some of my readers in Japan aren't sure what the "straw" is made of. 
Here is a link to the Shredded Wheat.
Easy turkey feet piped onto parchment paper.
 When candy hardens, gently peel feet off paper.
 Cover frosted cupcake with broken up shredded wheat. Place turkey legs upside down into cupcake. That's it! Cute Sweet!
Wishing You All A Blessed Thanksgiving 
From My Family To Yours
SUGARTOWN SWEETS
thanks you for stopping by today!
I enjoy reading all your comments. :o)